Incorporating Multiple Audiences into Your Survey

Have you ever needed to create multiple audiences under one sampling pool for your survey research? Now you can, with the new Multiple Audience feature in the Pollfish dashboard.
This feature creates a hyper-targeted audience landscape, allowing you to select various demographics, mobile usage and geolocation criteria — for multiple audience groups. Previously, the platform allowed researchers to select these criteria, but for one audience group only.
The Purpose of the Multiple Audience Feature
With this new feature, you will be able to create separate audiences in one survey and achieve any targeting combination you desire.
Essentially, the feature allows you to apply quotas within the quotas and conditions within conditions. You can also use minimum quotas, in which only a percentage of an audience gets assigned a quota (which you select), while the rest does not and will therefore receive random response types.
This will allow you to achieve a hyper-granular approach to targeting your sampling pool, aka, the survey respondent audience.
Laying Out the Components of the Multiples Audience Feature
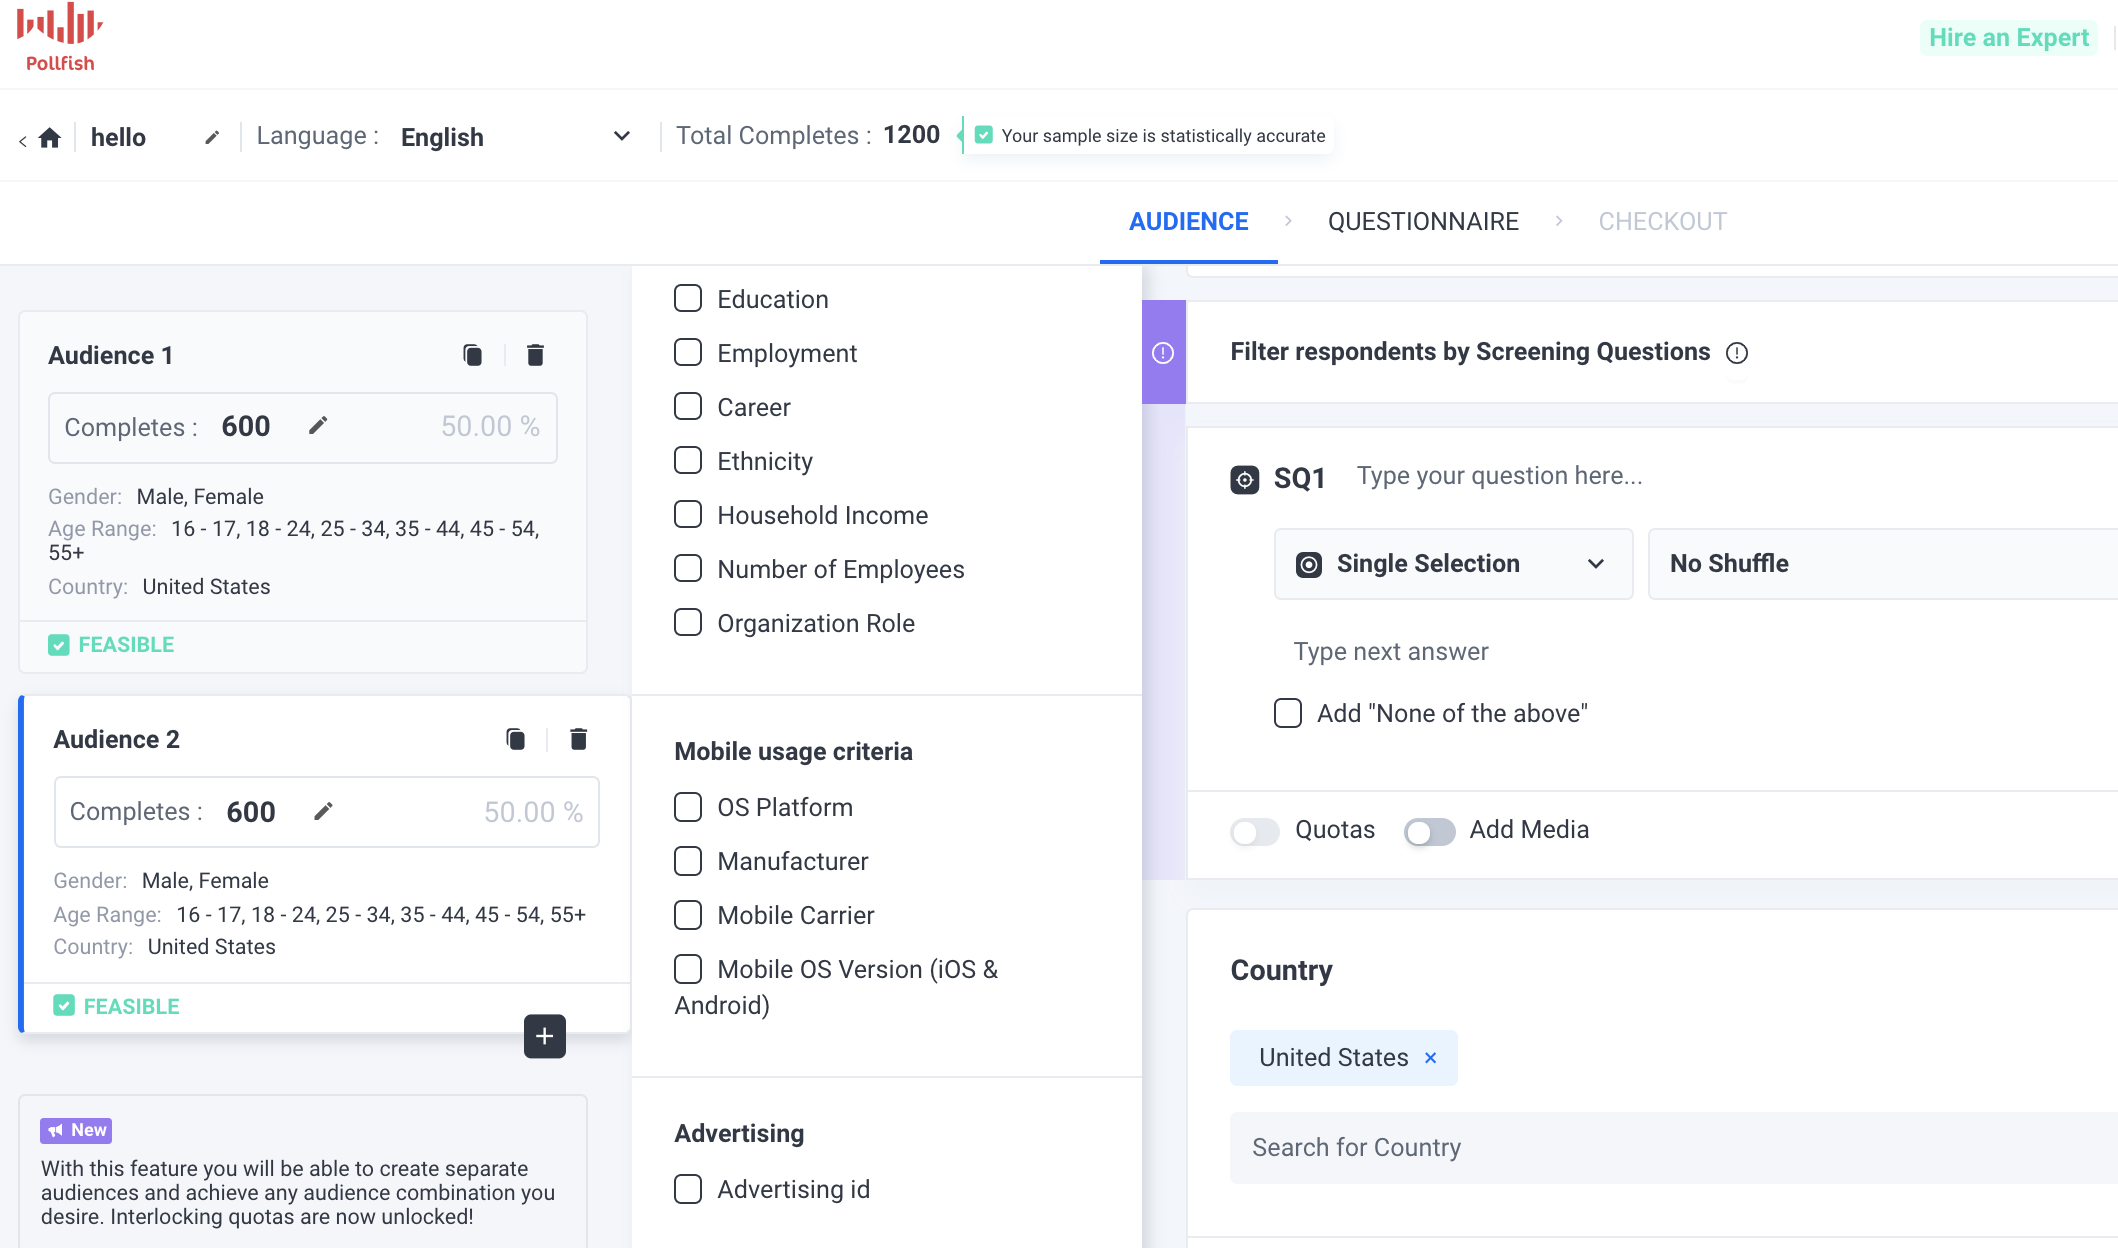
The feature includes separate audience blocks that can be customized as you so choose. Each block represents an audience group, i.e., Audience 1, Audience 2, etc. There is no limit to the number of audience blocks you can create, so long as they don’t exceed the total amount of survey completes.
The blocks also present a wide variety of audience category selections. As with the previous single-audience capability, this one allows you to create quotas for each type of demographic, geolocation and mobile usage selection, along with a maximum of 3 screening questions. This is known as layered demographics conditions, which are also called interlocking quotas.
Prior to the update, researchers were able to apply separate quotas to each targeting variable (non-interlocking quotas, or overlapping quotas). For example: in a sample pool of 1,000 respondents, the requirements may be: 500 (50%) men and 500 (50%) women, 500 (50%) young people and 500 (50%) older people. In this instance of non-interlocking quotas, you risk a pool of 500 young men and 500 older women.
Interlocking quotas can avoid this, in which a quota is defined by more than one variable. The interlocking percentage involves multiple variables, for example, household income, gender and age.
In reference to the aforesaid example, you can define a target size for each combination of variables. That means you can mandate 250 young men (50% x 50%) 250 young women, 250 older men and 250 older women. This assures that not only will you get respondents of every variable, but that they are collected evenly (if you so choose with your assigned quotas).
Each audience, regardless of how different will have the same language, as they are each part of one survey, i.e., one sampling pool.
The Pollfish platform will calculate the CPI and feasibility of the survey by taking into account all the conditions of each audience.
How to Create Multiple Audiences
To create multiple audiences and use their various features, follow these steps. Keep in mind that, while they give complete direction in using all the new feature’s functionalities, your survey may go in a different direction. As such, you may not have to follow all the steps enumerated below if you don’t need certain functions and additions.
- Create a new survey.
- You will be taken to the “audience” interface.
- Begin by choosing the number of completes — the maximum number of respondents in the first audience.
- The total completes on the top left will reflect how much completes you have by adding up the completes in each audience block.
- Start with the age and gender criteria. Select the subcategories your survey is targeting. Add quotas to each subcategory (male or female, or within the age ranges).
- Next, move onto the screening questions portion and add three questions that pertain most to your survey (a maximum of 3 per survey, meaning a maximum of 3 no matter how many audiences you add).
- Decide which criteria to use for this particular audience, as you can choose various subcategories under demographics, geolocation, mobile usage and even advertising ID.
- By enabling this criterion, all responses of the survey will be accompanied by the respondent’s advertising ID (in an Excel sheet export).
- Once you decide which criteria to use, apply quotas. You may add more or less completes to Audience 1, just make sure you don’t use up the total completes.
- After setting up your first audience, click on the + icon on the bottom of the Audience 1 block.
- This will open up a new audience group, aka, block.
- Follow steps 2-6 for your next audience selections.
- Follow step 7 should you wish to add more audiences.
- Review the entire audience section. Check the total completes to ensure you’re going to enlist the correct amount or respondents in the platform.
- Also, make sure the audience blocks are all feasible.
- If a block is not feasible, adjust the targeting design of the audience related to a ”not feasible” estimation to make it feasible. You can expand the targeting, remove quotas or filters.
- You’re all set with Multiple Audiences and the audience section at large; you can now move on to the questionnaire.
This new feature will allow you to hyper-target your survey to befit a wide variety of segments in your target market, or any of your subject of interest.