More Than DIY – New Services on Our Platform!
New Services on Our Platform! 🎉
Get ready for some exciting news! Pollfish, your go-to DIY market research platform, has just leveled up! Thanks to our partnership with Prodege, we now offer additional services directly through our platform. This means that Pollfish clients can now access the whole suite of Prodege market research services in a snap!
🤝 Pollfish & Prodege: A Dynamic Duo
While some of you are familiar with our relationship with Prodege, many of you may not be aware of the valuable services they offer. To make life easier, we've integrated a section in our platform for users to select Prodege services directly. Let's take a closer look at what's new!
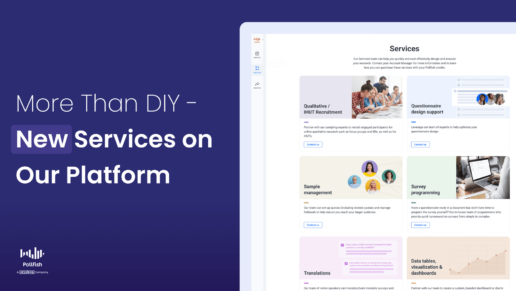
📢 Announcing 7 New Services at Your Fingertips!
🎤 Qualitative / IHUT Recruitment - Need engaged participants for online qualitative research, focus groups, IDIs, or IHUTs? Our sampling experts have your back! Ensure the right audience is recruited for valuable insights, improving research reliability.
📚 Questionnaire Design Support - Optimize your questionnaire design with the help of our team of experts! Achieve better data quality and reduce potential biases through a well-designed questionnaire.
🎩 Sample Management - Let our team set up quotas (including nested quotas) and manage fieldwork to ensure you reach your target audience. Streamline fieldwork and reduce sampling errors for more accurate and representative data.
💻 Survey Programming - Need to program a survey from a document? Our in-house team provides quick turnaround on surveys from simple to complex. Save time and effort while ensuring your survey is programmed accurately and efficiently.
🌐 Translations - Have your surveys and open-ended responses translated/back-translated into 50+ languages by our team of native speakers. Reach a global audience and enhance cross-cultural understanding with accurate translations.
📊 Data Tables, Visualization & Dashboards - Create custom, branded dashboards or PowerPoint charts and graphs using our innovative Insights Builder tool. Make your data more understandable and visually appealing for impactful presentations.
📈 Topline Insights Report - Collaborate with our insights experts to generate topline reports with key findings from your survey data. Quickly identify essential trends and findings, simplifying data-driven decision making.
DIY to DI-WHY-Not: Expanding Your Capabilities
We know that Pollfish users are used to doing things themselves. However, we also understand that you may be pressed for time, need help, or require market research services beyond our capabilities. With our new Prodege-powered services, you no longer have to choose between DIY and expert assistance. You can have it all! By teaming up with Prodege, we're providing you with a seamless, end-to-end market research experience that saves you time 🕒, money 💰, and resources 🌳.
How It Works
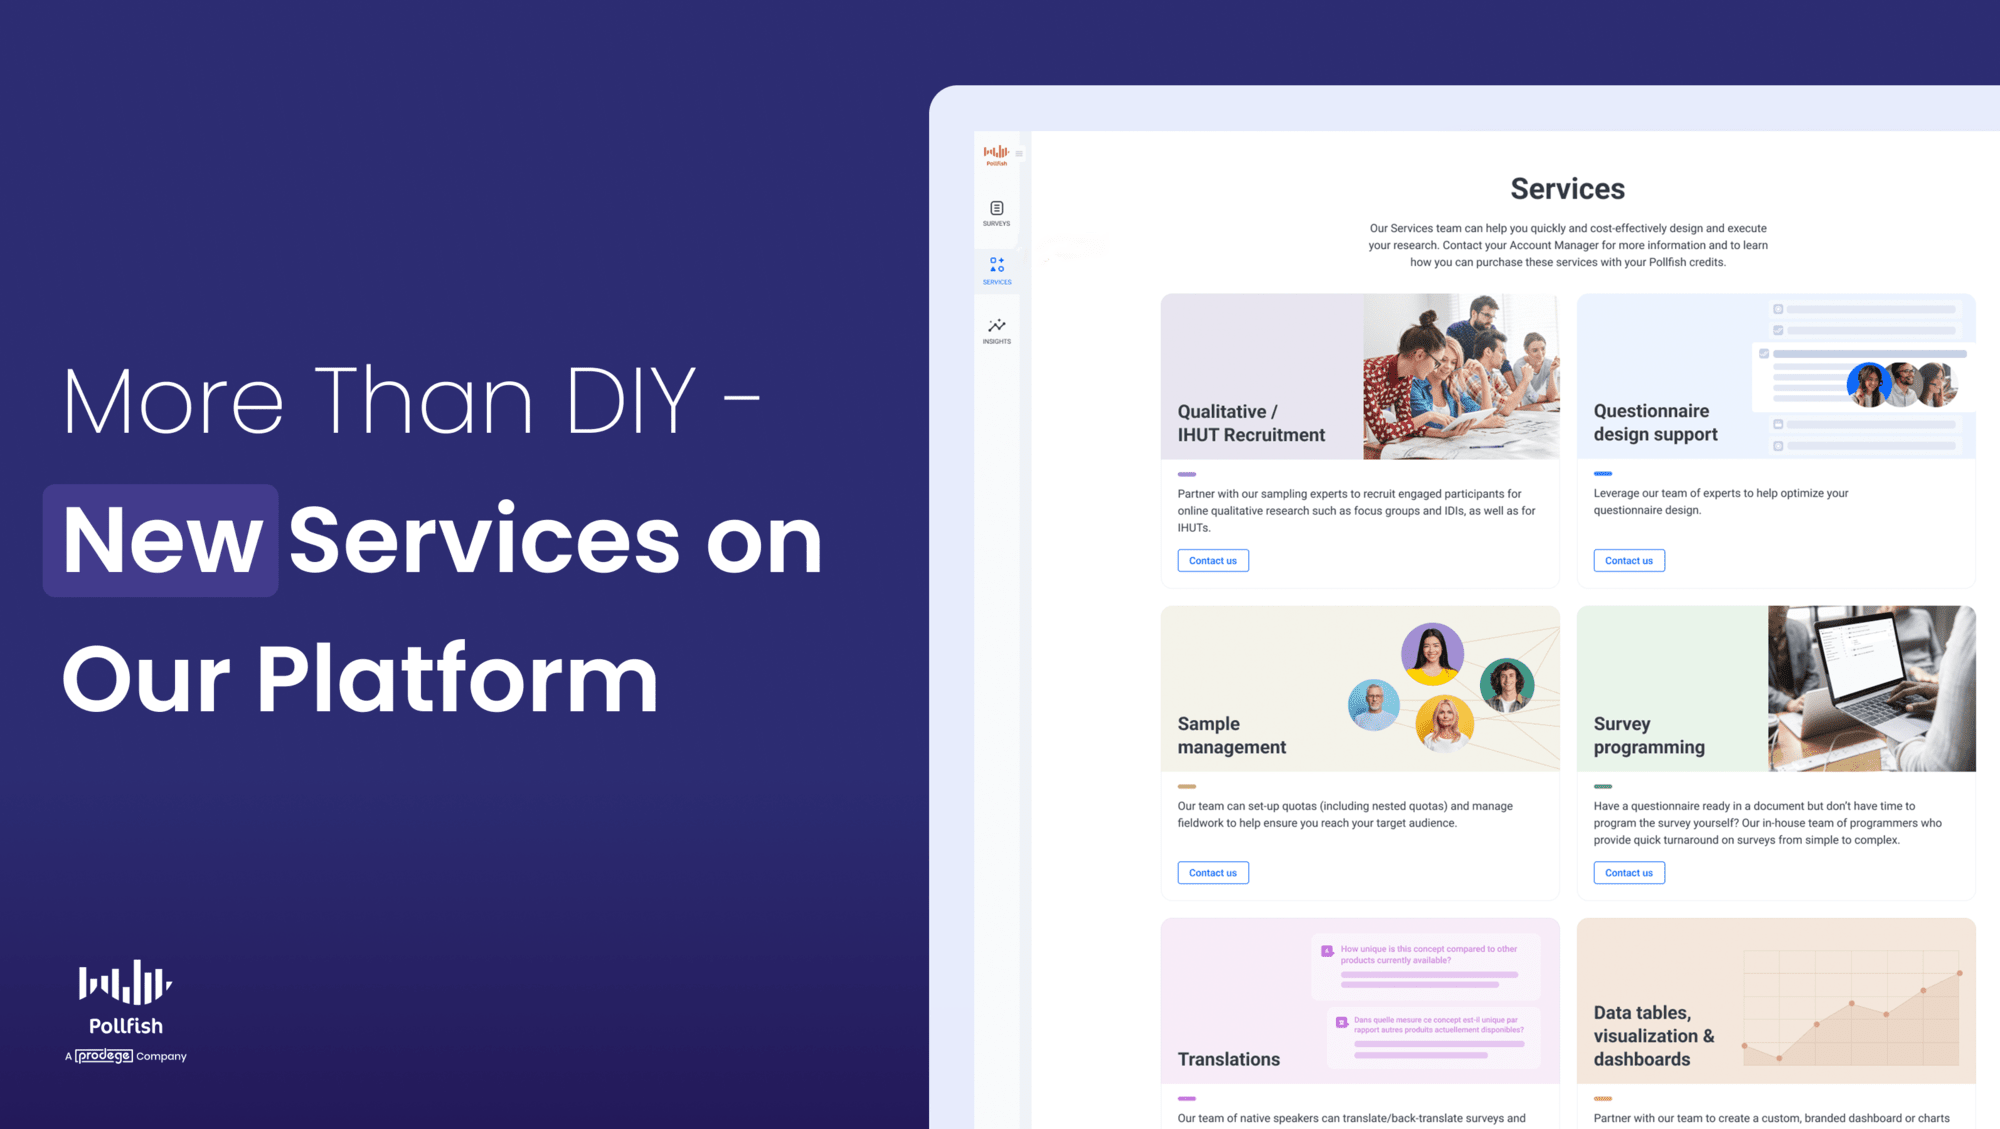
As you’ll see in the screenshot below, all you need to do is select services tab on the left when you're logged into the Pollfish platform, and you'll be able to select from these 7 services, in which you'll be connected with the appropriate expert:

A Celebration of Collaboration
Ready to try our new services? They're available right now on our platform. Simply select the Prodege services you need, and let us do the rest! Whether you're a seasoned Pollfish user or new to our platform, our team of experts is here to help you take your market research to the next level.
Let's make market research more accessible, efficient, and enjoyable together! Don't miss out on this amazing opportunity to enhance your research capabilities and achieve even greater success with Pollfish and Prodege! 🥳
Pollfish's New Platform Design
Pollfish's New Platform Design

Pollfish has revamped its user interface to enhance the experience for survey creators and to pave the way for numerous exciting features this year.
There are two main changes.
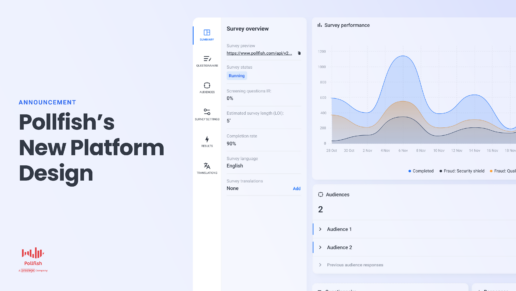
Update #1: New survey summary page.
Section 1: Survey Overview.
Need a quick overview of your survey? This section provides information on survey status. Depending on your survey type, this may include statuses such as draft, pending, paused, active, completed. You will also find other relevant information such as incidence rate (IR), estimated length of interview (LOI), completion rate, languages, translations, a brief preview, and easy access to downloads.
Section 2: Survey Performance.
Looking for insight into completion time? This section helps you visualize your survey's completion rate with a straightforward time series chart, and additional details on completion.
Section 3: Audience Snapshot.
Want to verify your target audience quickly? Obtain a concise snapshot of the selected audience(s), including all preselected demographic targeting criteria.
Section 4: Status Funnel.
Curious about drop-offs in your survey? This section enables you to see the number of people reaching each stage of the survey. Depending on your survey this may include stages such as accepted, passed profiling, passed screening, started survey, and finished survey.
Update #2: New menu navigation.
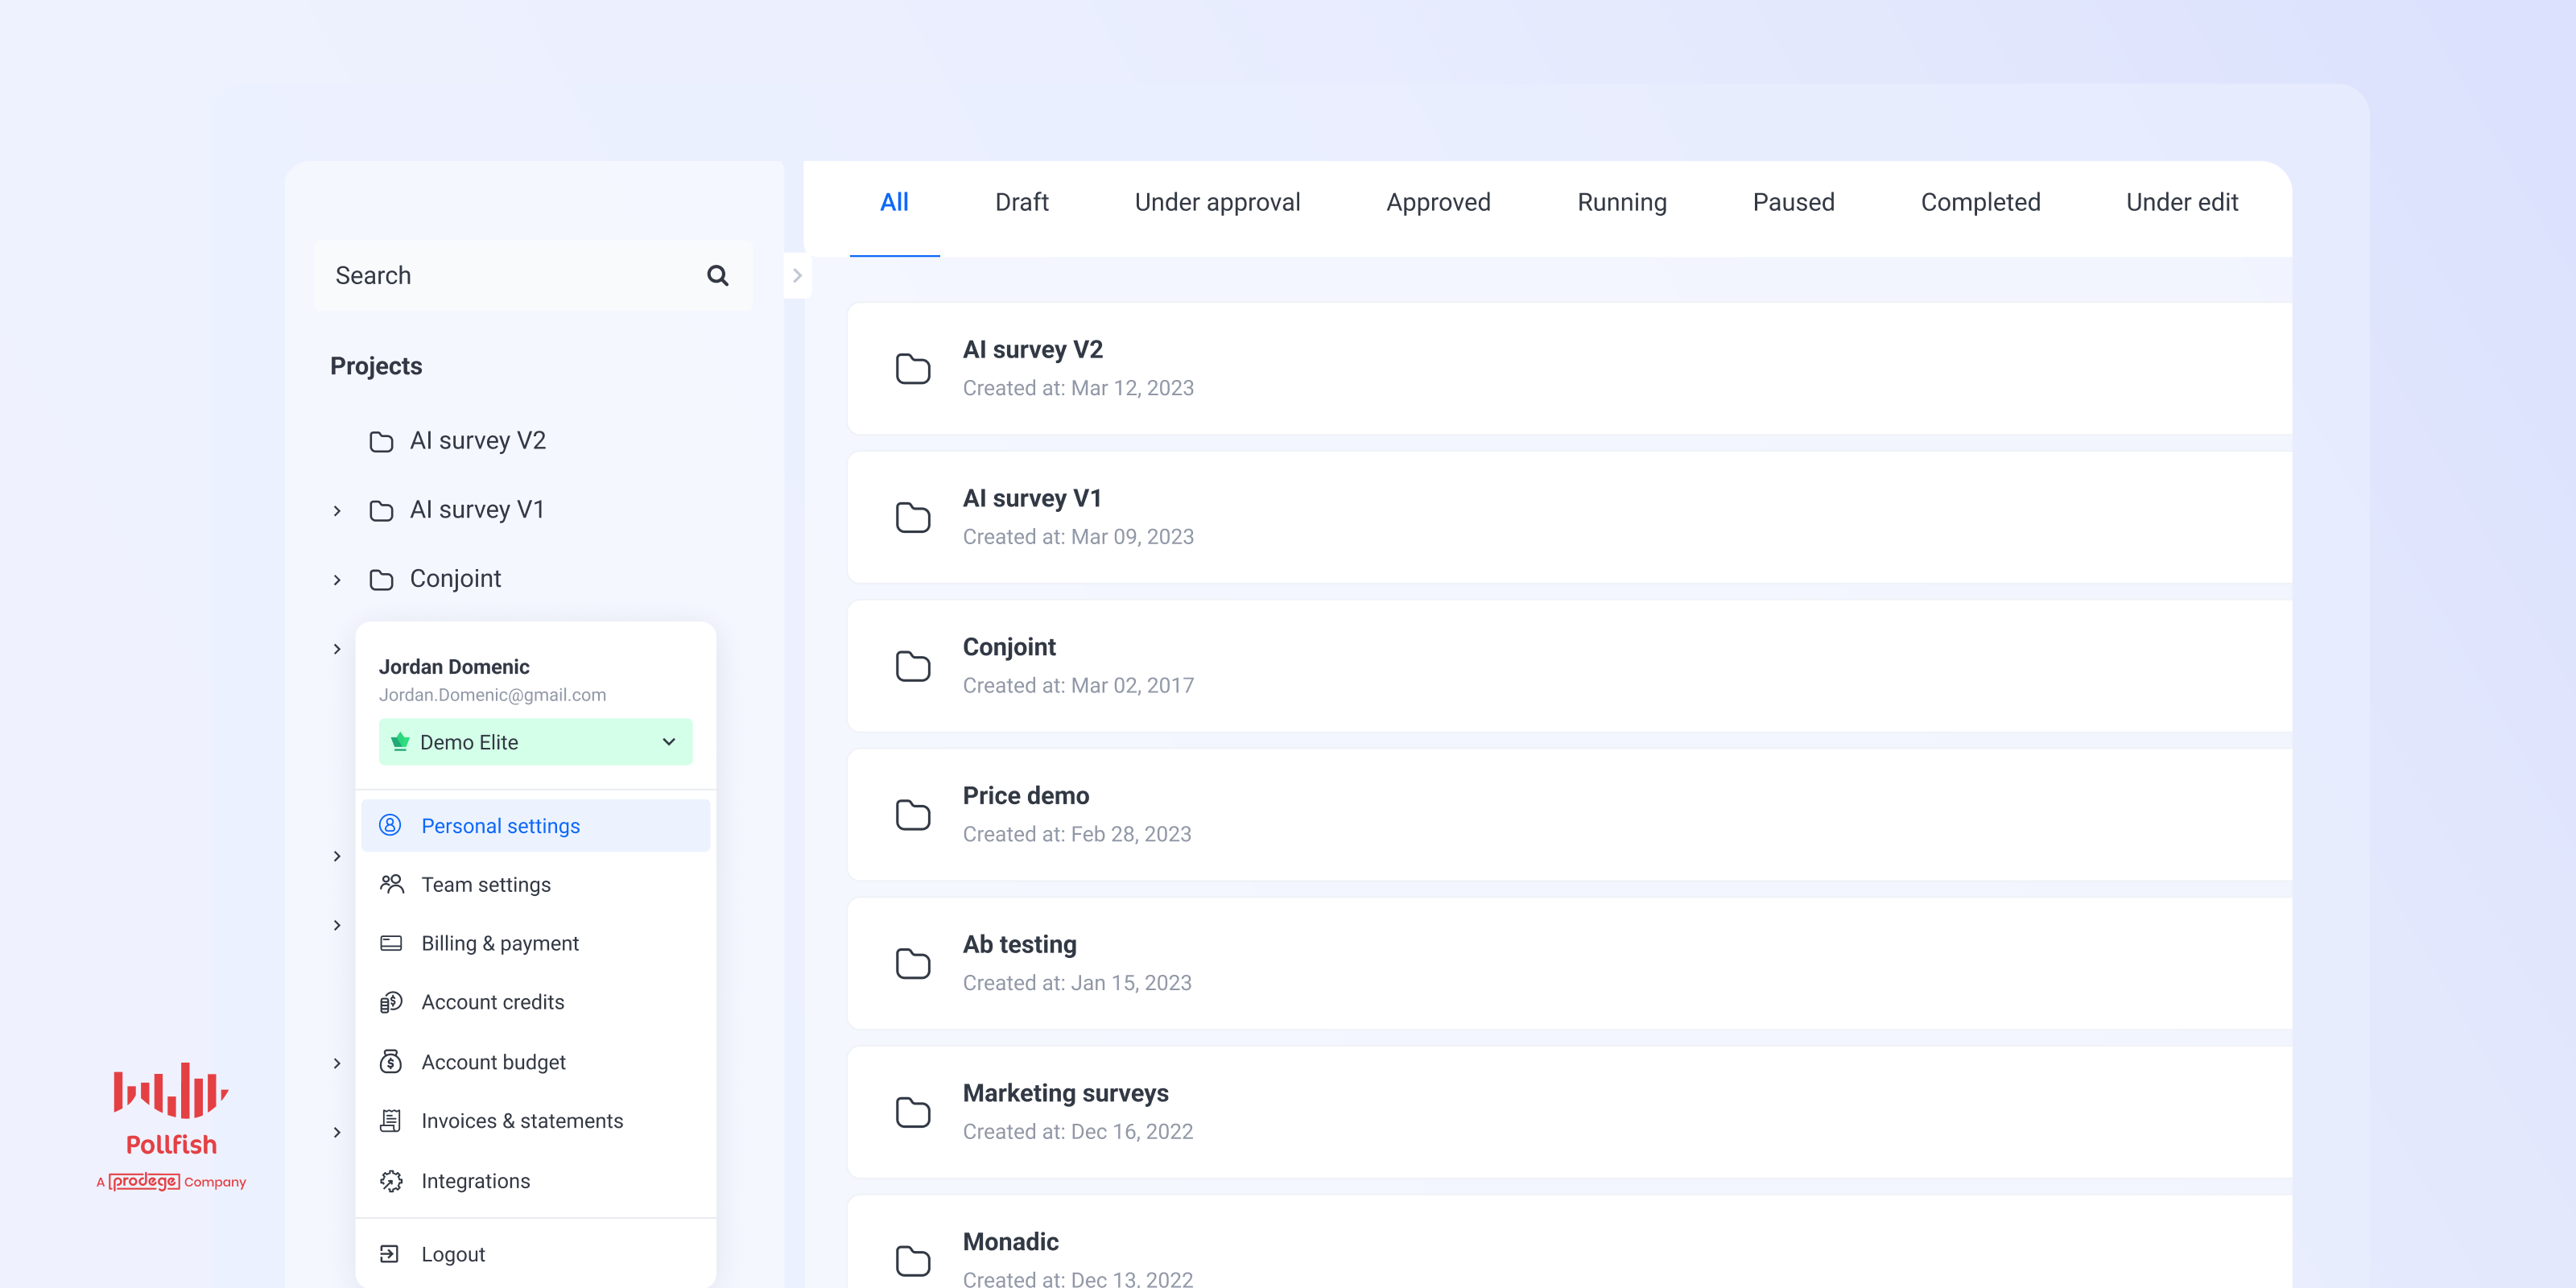
You might notice a subtle change in Pollfish's layout. Folders and surveys now appear in a panel on the left, while account details have moved from the top-right corner to the bottom-left corner.
This update allows direct access to surveys nested in folders from the side panel and, more importantly, prepares the interface for advantageous features arriving this year.

Major upgrade to Pollfish AI survey builder
Major upgrade to Pollfish AI survey builder

Attention all researchers, marketers, and data enthusiasts! Pollfish's AI Survey Builder just got even better! We're proud to introduce our latest upgrade, which includes Maxdiff and Conjoint Analysis questions in addition to our existing arsenal of question types. The days of laboriously creating surveys are over – the Pollfish AI Survey Builder has got you covered!
The More, The Merrier: New Question Types Galore 🌟
Our upgraded AI Survey Builder now offers an impressive array of question types:
- Single Selection
- Multiple Selection
- Numeric Open-ended
- Text Open-ended
- Rating
- Ranking
- Sliders
- Maxdiff (Maximum Difference Scaling) 🆕
- Conjoint Analysis 🆕
With this major upgrade, your surveys can be more comprehensive and engaging than ever, allowing you to capture a wide range of insights from your target audience.
How It Works 🛠
As you'll see in this example below, all you need to do is select the type of survey you'd like to create.
On the left, you'll find a dropdown below where you'd normally enter your prompt, with options for:
- Main question types
- Conjoint method
- Maxdiff method
Simply pick the type of survey to auto create, and let the magic happen!

Pretty cool, right?
A Whopping 42,978 Survey Prompts Entered & Counting! 🚀
In just three months, we've had a jaw-dropping 42,978 survey prompts entered into the Pollfish AI Survey Builder! This outstanding number speaks volumes about the trust and value users place in our AI-powered tool. And now, we're taking it up a notch with the introduction of Maxdiff and Conjoint Analysis questions in our latest upgrade. Say goodbye to tedious survey creation – the Pollfish AI Survey Builder has your back!
In Conclusion: Join the AI Revolution Today!
It's time to embrace the future of survey creation! With the latest upgrade to our Pollfish AI Survey Builder, you'll be able to enjoy more the in-depth research capabilities you're already used to... But it will be:
- Way faster to create - thanks to Pollfish AI 2.0.
- Way faster to run - thanks to the massive global reach of the Pollfish audience.
- And soon, way faster to interpret your results - thanks to planned future feature releases.
So, what are you waiting for? Join the AI revolution and try out the upgraded Pollfish AI Survey Builder today!

How to Use Concept Rules in Your Monadic and Sequential Survey
How to Use Concept Rules in Your Monadic and Sequential Survey

What can I achieve with concept rules?
With concept rules, you can differentiate the follow-up questions a respondent gets and obtain better insights from the test. The evaluation questions of the test will remain the same for all concepts, no logic can be applied within the questions of the test.
By using concept rules in your monadic or sequential test, you can direct the respondent - after he finishes with the evaluation questions, to follow-up questions curated specifically for the concept or concepts he got.
For example, for a monadic test, you can make follow-up comparison questions that test how a respondent perceives the product he saw in comparison to another one.
How do concept rules work?
You can apply concept rules at the AB group, so that when the respondent finishes with the questions of the AB, to be redirected to a specific question outside of the group based on the concept they got.

You can also apply complex rules containing concept rules, in the case you want to combine specific answers from regular questions with concepts shown.
- Add a monadic or sequential test to your survey
- Open the logic page
A. For simple rules:
- Select the question or the ab test group, you want to apply the rules
- In the rule, you can select the “if concept at” and pick the concept you want to apply the rule
- You can add rules for all concepts or for some of the concepts
For example, let’s assume that you want to conduct a monadic test for 3 soft drinks, and have the respondents compare 2 out of these 3 in the case they got one of these 2 in their monadic.
B. For complex rules, combining concepts with answer questions:
i. Select the question or the ab test group, you want to apply the rules
ii. In the rule, you can select the “if concept at” to pick the concept you want to apply the rule, click “Add” and select “if answer at” to pick the question’s answer you want to add.
For example, let’s assume that you want to conduct a monadic test for 2 soft drinks, and drive the respondent to answer a specific follow up question provided that he has also given a specific answer to a regular question (outside of the A/B)
What is the mobile flow a respondent gets with concept rules applied?
For the first case of rules(2a), the respondent will follow the following flow: Pollfish Survey
For the second case of rules(2b), the respondent will follow the following flow:
Or this: Pollfish Survey
Can I combine a sequential test with concept rules?

Yes, for a sequential test, you can apply concept rules with complex logic if needed. For example, you can conduct a sequential test for a respondent to view 2 out of 3 concepts, and based on the concepts he got, make a comparison after the sequential questions finish.
Here you can find how to set up such a sequential test with a follow-up comparison question:
Here you will preview what the respondent gets: Pollfish Survey

How to Do Away with Typos With the Edit Questionnaire Feature
How to Do Away with Typos With the Edit Questionnaire Feature
When forming the questionnaire — the heart of the survey — even the most diligent market researchers are bound to come upon errors. At Pollfish, we’ve created a solution that can nip this issue in the bud without needing to slow down the survey process.
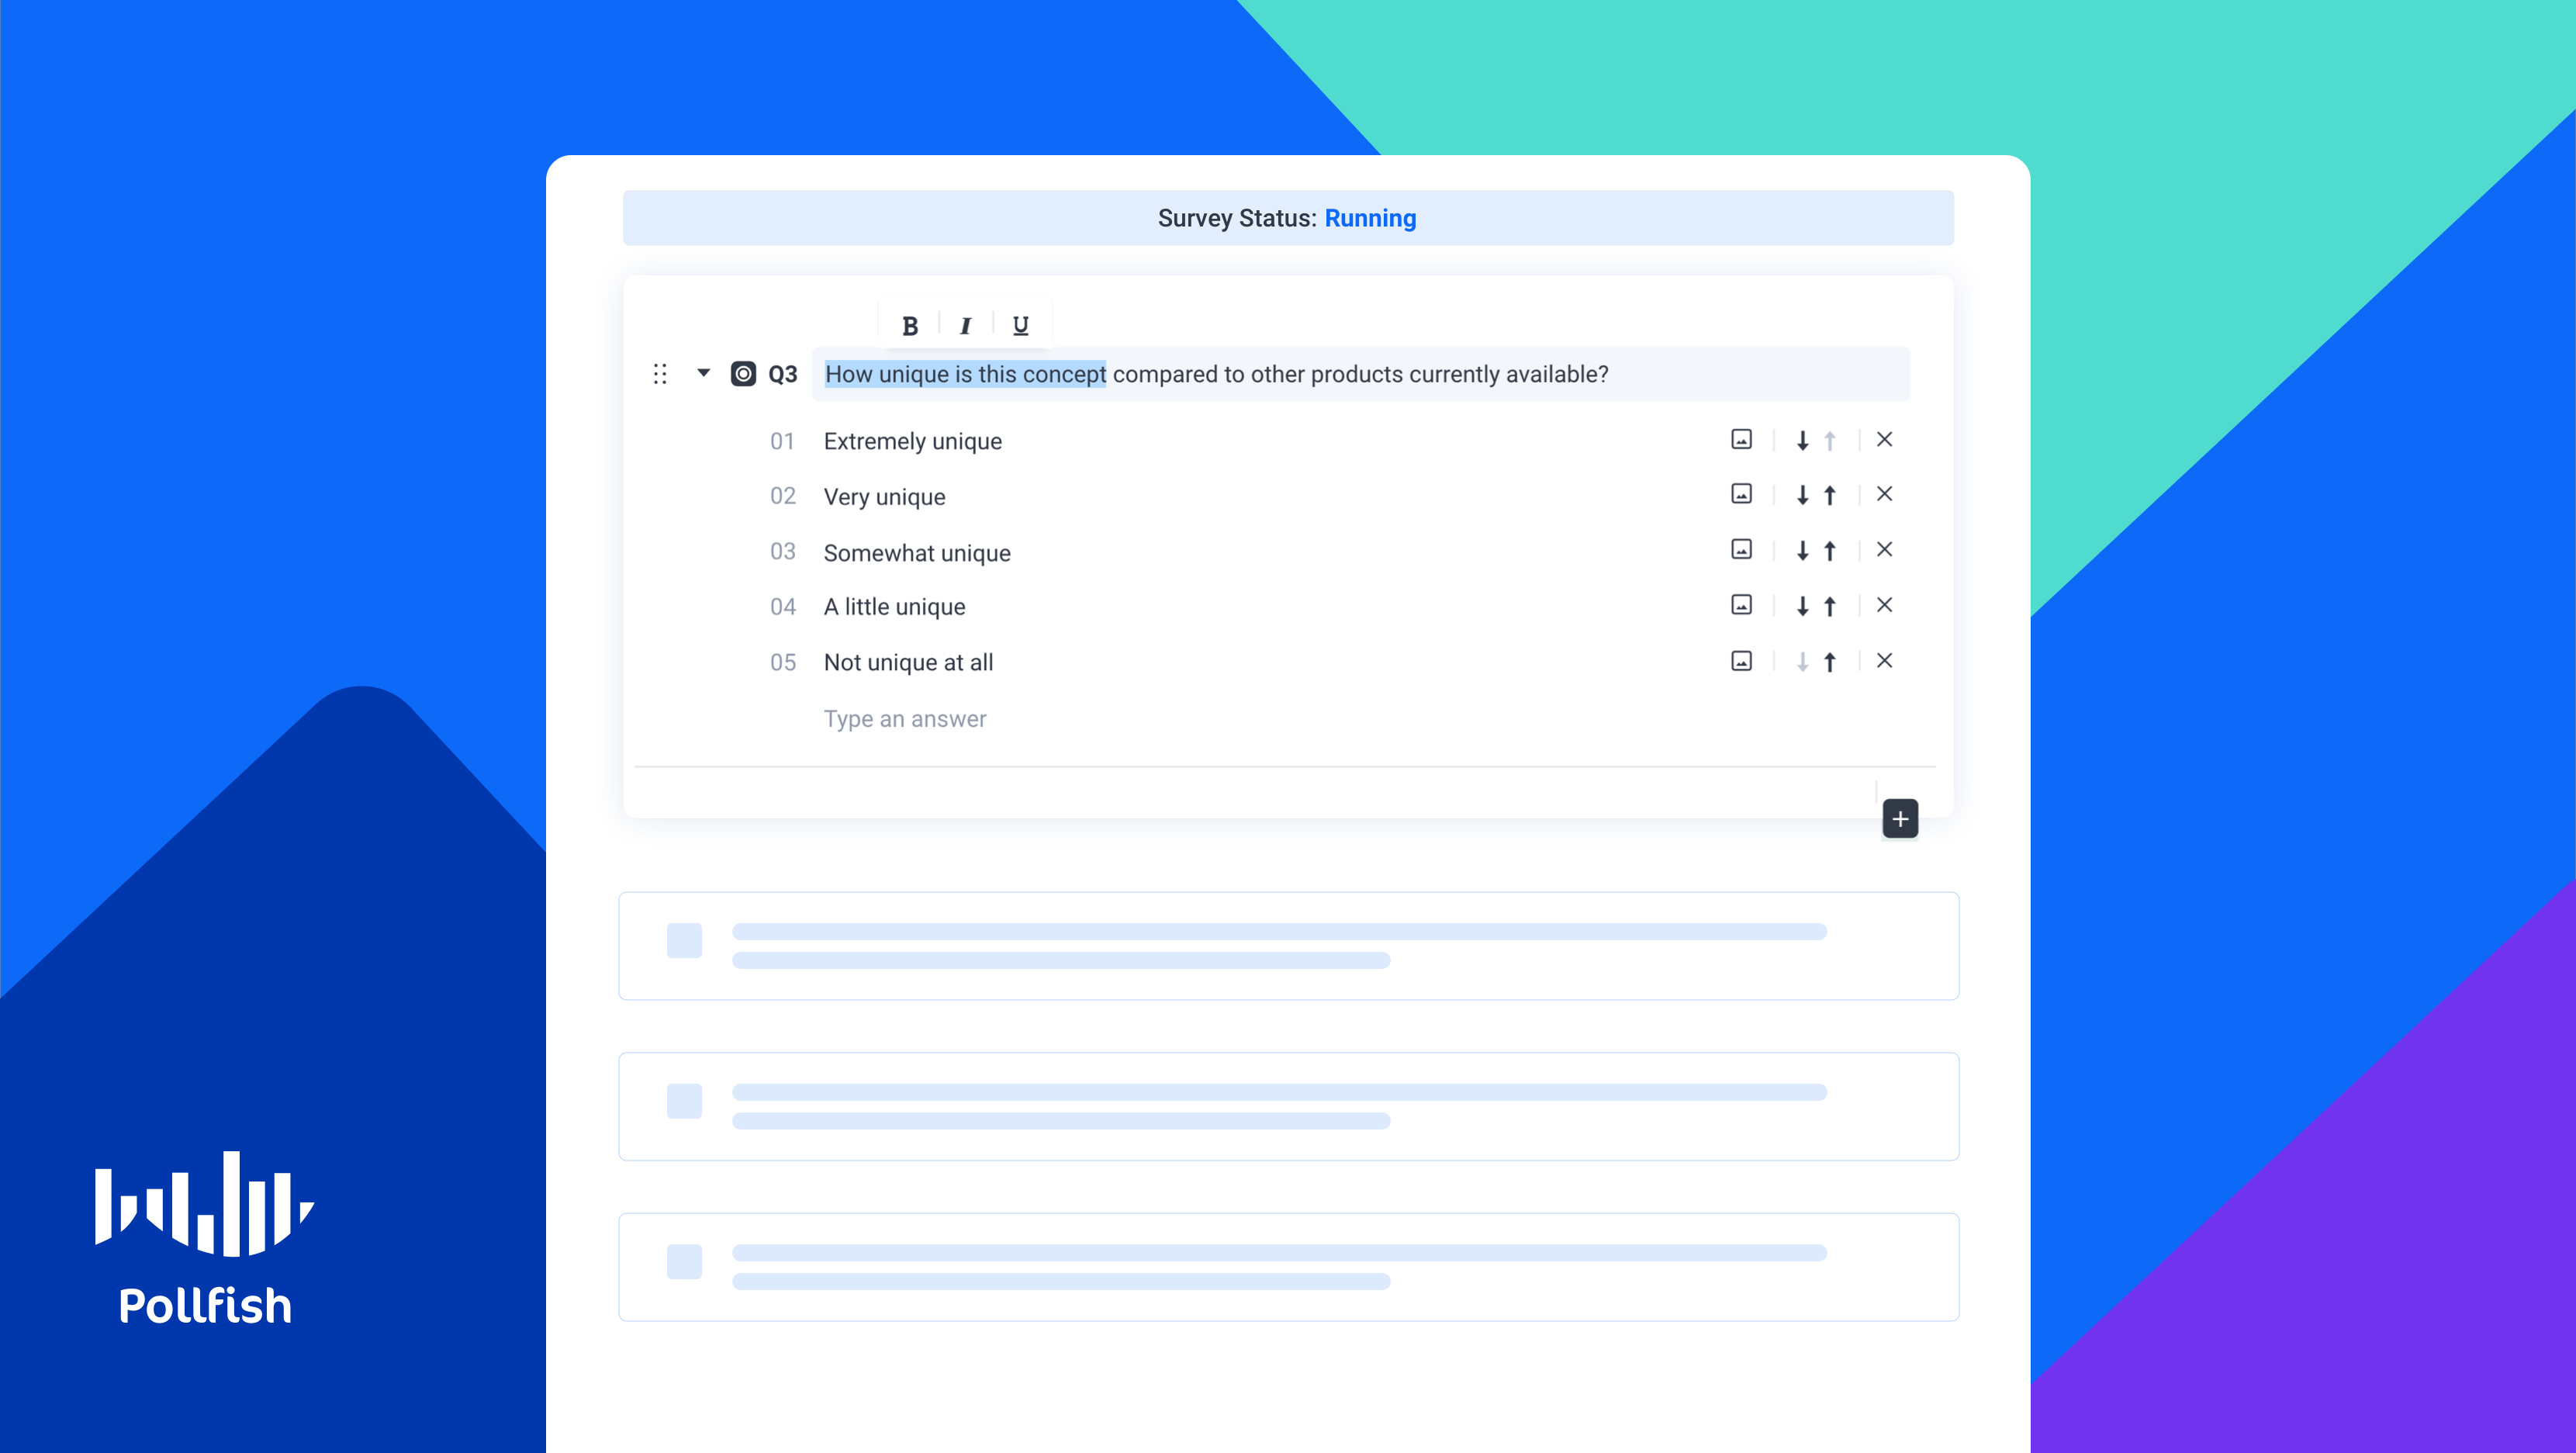
Pollfish has released a new feature that allows researchers to quickly remove typos and correct any text-based errors in all surveys.
With the new Edit Questionnaire feature, researchers can edit their typos and other text if need be, in any survey they choose, regardless if the survey is still running or complete. This creates a much more smooth survey experience for the researchers, as they don’t have to stop a running survey, or even pause it to adjust textual errors.
This article explains how to use the Edit Questionnaire feature and how any market research campaign can benefit from it.
Understanding the Edit Questionnaire Feature
Market researchers have likely caught a typo error in a running survey in the results of a completed survey. Researchers now have the ability to correct typos and edit all text fields regardless of the survey status, thanks to the Pollfish Edit Questionnaire feature.
This includes making the corrections and other textual edits in questions, answers, statements, scale points, concepts, etc.)
This new feature is available to all researchers under all of our plans.
The Edit Questionnaire does not require researchers to make any status changes to the survey they are editing. As such, researchers don’t need to pause, stop or resume any survey they use this feature with.
The Usefulness of the Edit Questionnaire Feature
This feature is useful for virtually any survey research campaign, as it equips market researchers with a handy and practical way of fixing typos without halting or pausing a survey. Typos can occur even among the most meticulous researchers. It isn’t practical to stop a survey or change its status, as this delays the survey process.
The Edit Questionnaire feature is the solution to this pesky issue, as researchers can now fix typos within their running studies and share them with their peers. They can do so without stopping a running survey or duplicating it to launch a copy. They can edit any text while the platform is deploying surveys and extracting responses.
This is useful as it helps researchers make changes as soon as they find them, allowing them to edit their questions as they please.
How to Use the Edit Questionnaire Feature
In line with the Pollfish commitment to user-friendliness, this new feature offers ease of use and efficiency. The following explains how to use the Edit Questionnaire feature on the Pollfish platform.

- On the Pollfish dashboard, go to the surveys and hover over the survey you would like to edit.
- Here, you’ll find the three-dot button that grants you options on changing the survey status and using a feature.
- Click on the three-dot button on the right of the survey you would like to edit.
- A dropdown menu will appear.
- Click on “Edit Questionnaire” and you will be taken to the questionnaire of the survey you clicked on, which you can then edit.
- The ‘’Audience’’ & ‘’Checkout’’ pages will be grayed out.
- Here, you can also apply changes to the ‘’recall information’’ option. The rest of the options at the left panel are grayed out (carry forward, skip logic, etc).
- However, you can review (only) the ‘’apply logic’’ rules per question.
- Select “save changes’’ in the questionnaire page to save any changes you made.
- After clicking on ‘’save changes’, these changes will be reflected on the results page.
- Please bear in mind that there is no ‘’auto-save’’ button.
- When the survey’s status is ‘’Under edit’’ (Edit Audience), the option ‘’Edit Questionnaire’’ is also available.
- If you want to discard your changes, click back and confirm the action.
Creating Quality Surveys
In summary, researchers can improve the quality of their surveys as their surveys are running. They can ward off both their own typos along with those of their respondents. After hitting “save,” the changes become instantly available to respondents and the results.
Thus, using this feature is effective and friction-free.
Remember, as our surveys are running, our online survey platform uses AI and machine learning along with random device engagement (RDE) sampling to ensure the highest quality of responses.
Machine learning performs quality checks that disqualify gibberish and other low-quality answers, those using a VPN. RDE sampling engages digital users across a wide net of digital properties, without pre-recruiting them to take a survey.
The Pollfish platform is, therefore, best equipped to extract and deliver the best results.

How to Use the New Carry Forward Feature for an Enhanced Survey Experience
How to Use the New Carry Forward Feature for an Enhanced Survey Experience

As the heart of any survey, the questionnaire must be contrived carefully so that you receive the responses most necessary for your survey research. Creating the questions themselves can be difficult, especially if you choose to create question paths.
Pollfish is thus thrilled to present a new feature to make building the questions a much easier task: Carry Forward. This new attribute provides advanced piping capabilities to optimize your questionnaire experience.
The Purpose of the Carry Forward Feature
As a refresher, piping is a functionality that allows users to place, aka, “pipe,” a part of a question or answer into a subsequent question or answer.
In the Pollfish platform, piping works by taking the answer(s) from the sender question and inserting them to the receiver question.
In the first piping iteration, researchers were able to funnel answer choices from one question to another based on respondents’ selections. The following question would carry forward answers from previously piped answers.
The new Carry Forward feature carries (no pun intended) the function of enriching the question-building experience, as it allows you to pipe questions on more question and answer types, along with other capabilities.
This new feature helps researchers design specific questions that are more relevant to the respondent’s behavior, and more useful to their research.
It functions on both selected and unselected answers. It also can be used with:
- Matrix questions
- Ranking questions
- Single selection questions
- Multiple selection questions
Laying Out the Carry Forward Capabilities
Multiple Selection Questions
Along with carrying forward selected answers, this feature allows researchers to carry forward all the answers that the respondent did not select.
In the case of a multiple selection question, for example, the feature can carry forward the unselected answers into the receiver question.
Due to this, when a responder selects all the answers and proceeds, there will be no answer to carry forward, as there are no remaining unselected answers. For this precise reason, the Pollfish platform has developed a validation which exists as a dialogue box.
This pop-up allows the researcher to know that the Carry Forward feature cannot support this case, as it only works if at least one answer is unselected. This is due to the condition that unselected answers cannot be carried forward if all the answers have been selected.
Advanced Logic
This can be used in tandem with advanced logic, allowing you to augment your survey with multiple layers.
Enabling advanced logic (ADL) can trigger questions without forwarded answers. For example, when Carry Forward is enabled but a respondent skipped the sender question, the respondent will then be routed to a question without Carry Forward answers
Pollfish has also added front end validation that disables the researchers from proceeding with the previous structure.
Sender questions with either the “None of the above” or “Other” option must be structured correctly, that is, with multiple selection questions. If these aren’t added to the proper question, there will be pop-up error messages.
Carry Forward Answers that Contain Media
If the Carry Forward answer type is the same or similar to the source (question) type, such as:
- single to single,
- multiple to multiple,
- single to multiple, etc.,
then the platform will carry forward the media files together with the answers.
In other cases, such as different types between sender & receiver questions, there are certain conditions and rules that dictate how Carry Forward will work.
How to maneuver Carry Forward answers which contain media:
- If the Carry Forward answer type is the same or similar (single, multiple) to the source type ? the media will be carried forward.
- If the Carry Forward answer type doesn’t support media then:
- The text will be carried forward if the source answer contains both text and media.
- Carry Forward will not be supported if the source answer contains only media.
How to Add Carry Forward to Your Questionnaire
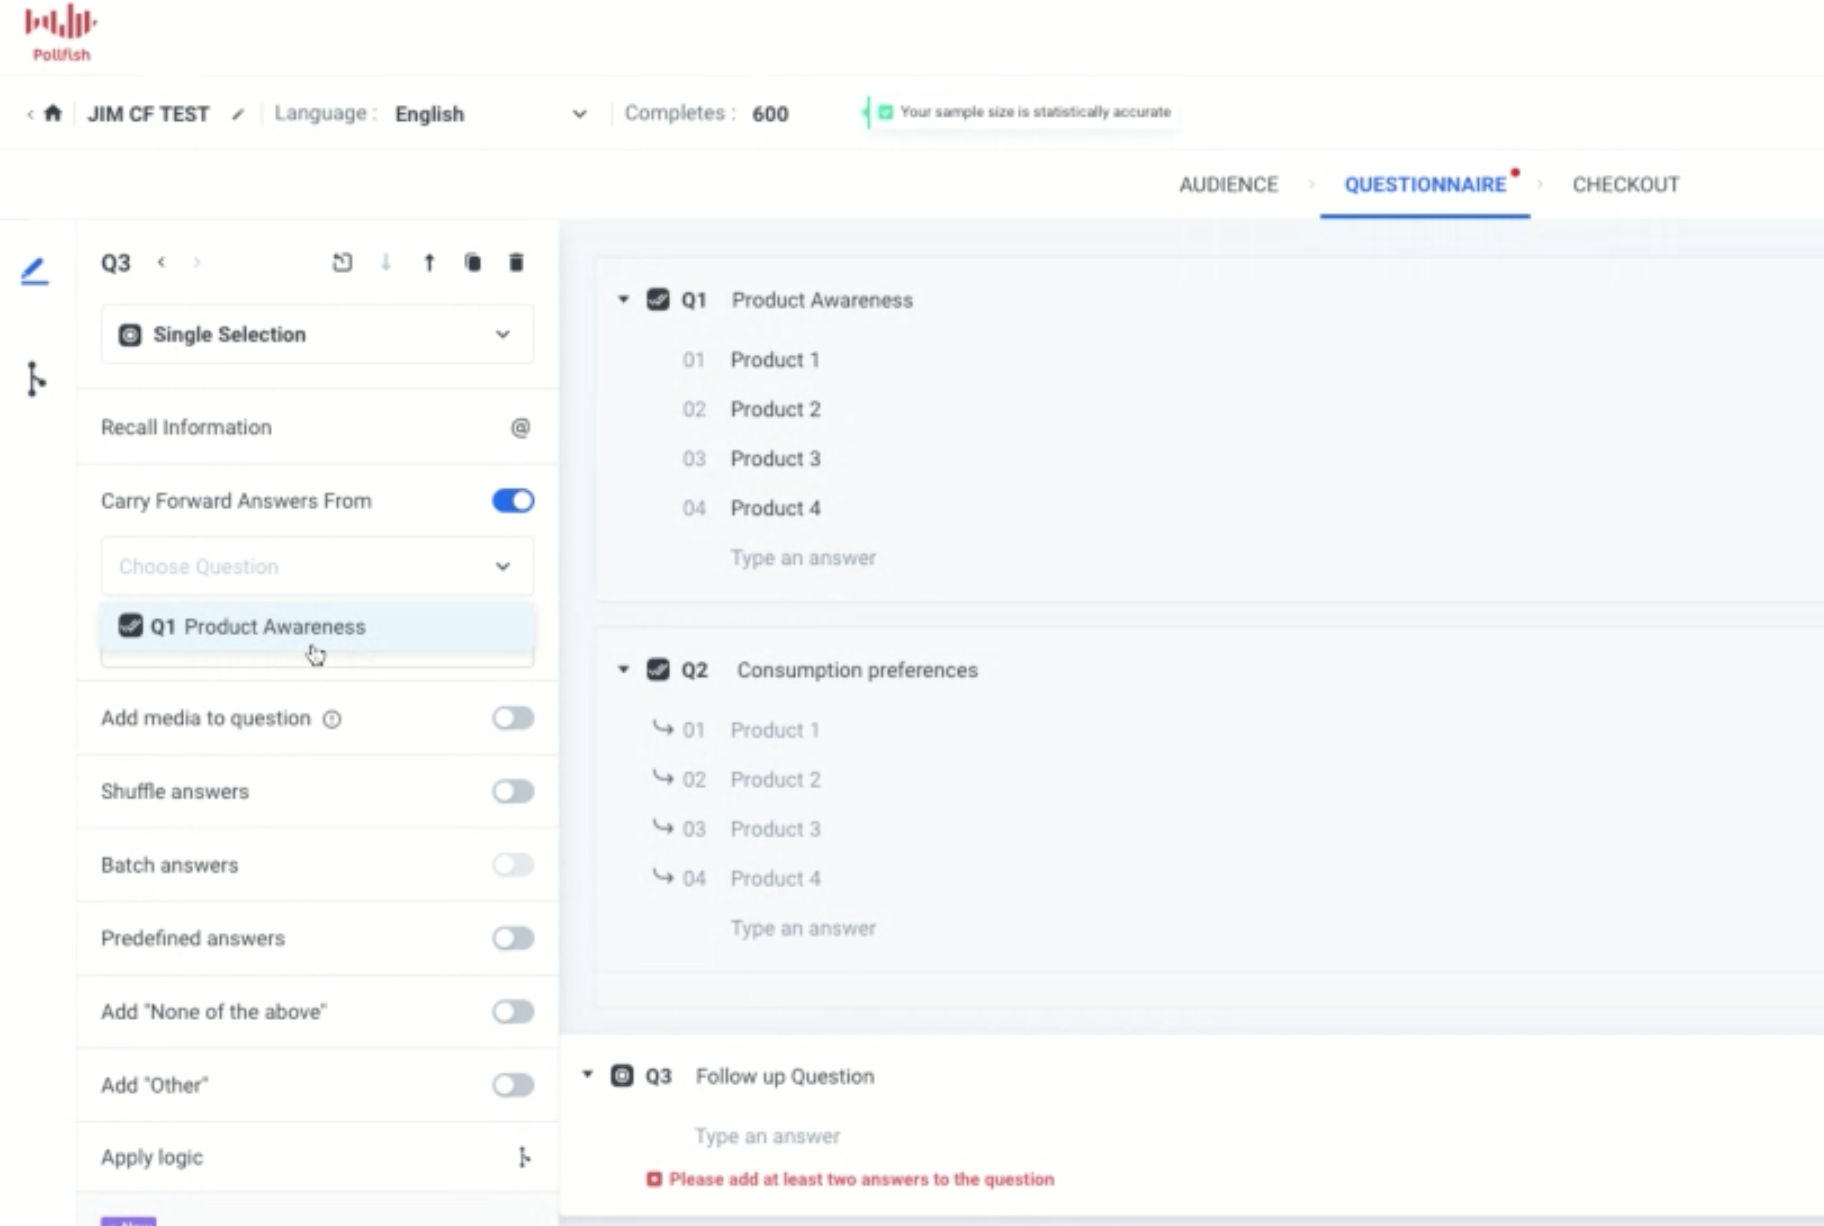
In order to add the Carry Forward feature, you’ll need to enter the questionnaire portion of the survey first (after completing the audience section). You’ll also need to have your questions and answers in mind.
You can add Carry Forward when you begin the questionnaire, as you’ll need at least two questions to use this feature, the sender and receiver question. You can also implement it to an existing questionnaire.
- Find the Carry Forward option at the left panel of the questionnaire.
- Find a sender and a receiver question you wish to apply the CF feature to. This can be in any order. For example, you can use Question 1 as the sender question and Question 2 as the receiver question.
- Enable this via the receiver question and select “Carry Forward” and then the selected or unselected answers from a previous question (the sender question).
What Carry Forward Supports Vs. What It Does Not Support
There are certain conditions that need to be met in order to apply the Carry Forward function. There are certain circumstances in which your questions will not be able to implement Carry Forward.
What it supports:
- Carry Forward can be used with single/ multiple/ ranking/ matrix questions when they are designed as receiver questions.
- When you carry forward a matrix question, there’s an additional option to narrow the choices based on selected columns, unselected columns, rows for selected columns, rows for unselected columns, and columns for specific rows.
- It is supported by single, multiple, open-ended, numeric, ranking, matrix, slider and OE when they are set up as sender questions.
- The researcher can carry forward all the questions that the respondent didn’t select.
- There is simultaneous support of advanced logic and Carry Forward.
- It supports Order/ Shuffle answers for funneling questions.
What it doesn’t support:
- Carry Forward cannot be used with description questions, Net Promoter Score (NPS) surveys and visual ratings surveys.
- It does not support screening questions and therefore cannot be used in them.
- It does not support the option of “Group and Randomize.”
Note: Closing off, you should know that responses that are carried forward will be treated the same as other answer choices on the results page.
We suggest you preview your survey design before submitting the survey itself. Try it out!

Incorporating Multiple Audiences into Your Survey
Incorporating Multiple Audiences into Your Survey

Have you ever needed to create multiple audiences under one sampling pool for your survey research? Now you can, with the new Multiple Audience feature in the Pollfish dashboard.
This feature creates a hyper-targeted audience landscape, allowing you to select various demographics, mobile usage and geolocation criteria — for multiple audience groups. Previously, the platform allowed researchers to select these criteria, but for one audience group only.
The Purpose of the Multiple Audience Feature
With this new feature, you will be able to create separate audiences in one survey and achieve any targeting combination you desire.
Essentially, the feature allows you to apply quotas within the quotas and conditions within conditions. You can also use minimum quotas, in which only a percentage of an audience gets assigned a quota (which you select), while the rest does not and will therefore receive random response types.
This will allow you to achieve a hyper-granular approach to targeting your sampling pool, aka, the survey respondent audience.
Laying Out the Components of the Multiples Audience Feature
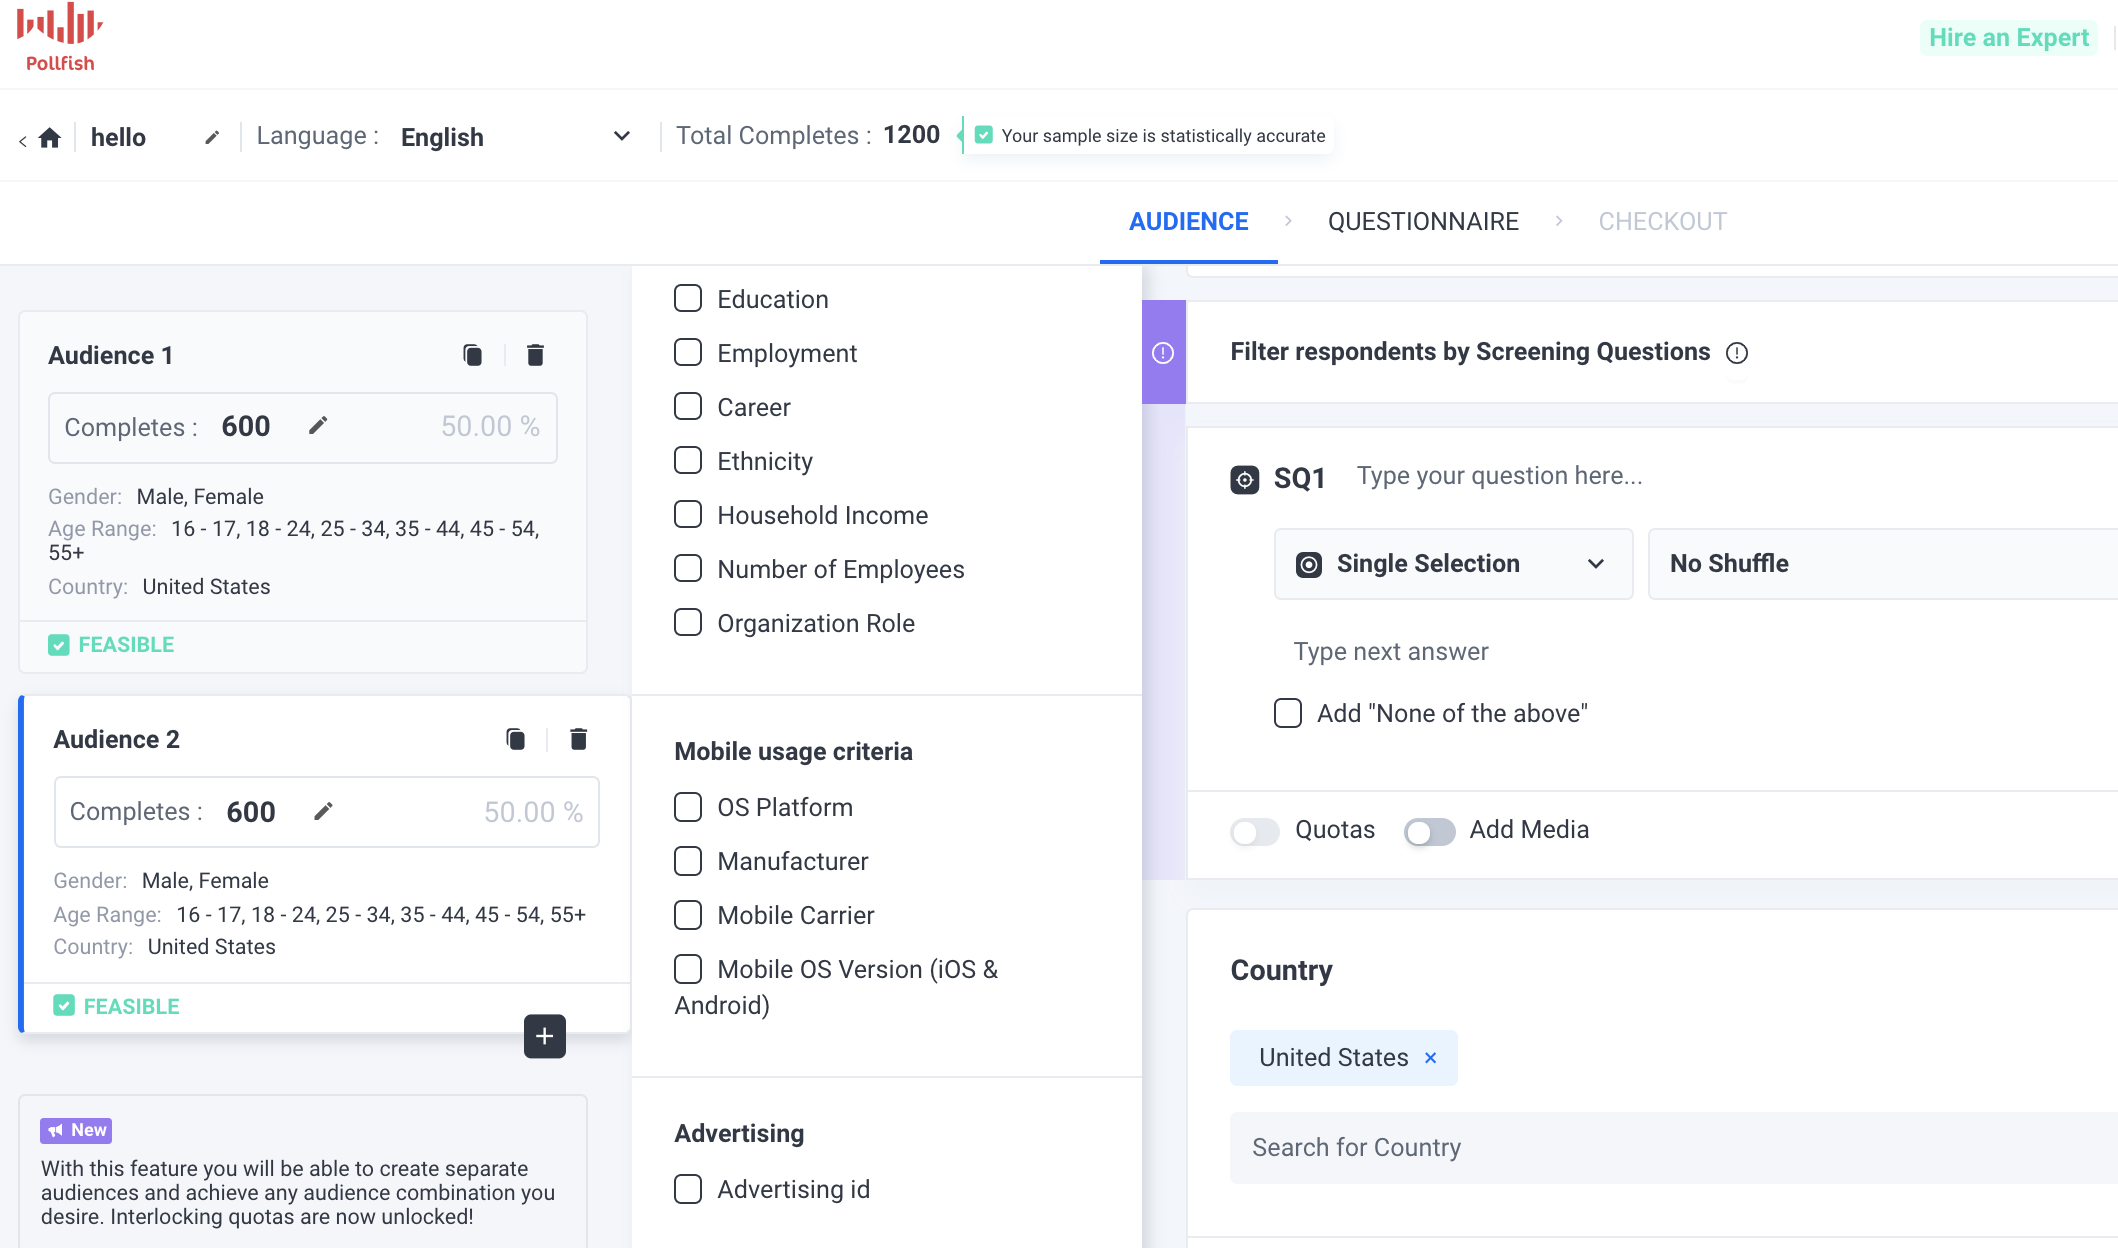
The feature includes separate audience blocks that can be customized as you so choose. Each block represents an audience group, i.e., Audience 1, Audience 2, etc. There is no limit to the number of audience blocks you can create, so long as they don’t exceed the total amount of survey completes.
The blocks also present a wide variety of audience category selections. As with the previous single-audience capability, this one allows you to create quotas for each type of demographic, geolocation and mobile usage selection, along with a maximum of 3 screening questions. This is known as layered demographics conditions, which are also called interlocking quotas.
Prior to the update, researchers were able to apply separate quotas to each targeting variable (non-interlocking quotas, or overlapping quotas). For example: in a sample pool of 1,000 respondents, the requirements may be: 500 (50%) men and 500 (50%) women, 500 (50%) young people and 500 (50%) older people. In this instance of non-interlocking quotas, you risk a pool of 500 young men and 500 older women.
Interlocking quotas can avoid this, in which a quota is defined by more than one variable. The interlocking percentage involves multiple variables, for example, household income, gender and age.
In reference to the aforesaid example, you can define a target size for each combination of variables. That means you can mandate 250 young men (50% x 50%) 250 young women, 250 older men and 250 older women. This assures that not only will you get respondents of every variable, but that they are collected evenly (if you so choose with your assigned quotas).
Each audience, regardless of how different will have the same language, as they are each part of one survey, i.e., one sampling pool.
The Pollfish platform will calculate the CPI and feasibility of the survey by taking into account all the conditions of each audience.
How to Create Multiple Audiences
To create multiple audiences and use their various features, follow these steps. Keep in mind that, while they give complete direction in using all the new feature’s functionalities, your survey may go in a different direction. As such, you may not have to follow all the steps enumerated below if you don’t need certain functions and additions.
- Create a new survey.
- You will be taken to the “audience” interface.
- Begin by choosing the number of completes — the maximum number of respondents in the first audience.
- The total completes on the top left will reflect how much completes you have by adding up the completes in each audience block.
- Start with the age and gender criteria. Select the subcategories your survey is targeting. Add quotas to each subcategory (male or female, or within the age ranges).
- Next, move onto the screening questions portion and add three questions that pertain most to your survey (a maximum of 3 per survey, meaning a maximum of 3 no matter how many audiences you add).
- Decide which criteria to use for this particular audience, as you can choose various subcategories under demographics, geolocation, mobile usage and even advertising ID.
- By enabling this criterion, all responses of the survey will be accompanied by the respondent’s advertising ID (in an Excel sheet export).
- Once you decide which criteria to use, apply quotas. You may add more or less completes to Audience 1, just make sure you don’t use up the total completes.
- After setting up your first audience, click on the + icon on the bottom of the Audience 1 block.
- This will open up a new audience group, aka, block.
- Follow steps 2-6 for your next audience selections.
- Follow step 7 should you wish to add more audiences.
- Review the entire audience section. Check the total completes to ensure you’re going to enlist the correct amount or respondents in the platform.
- Also, make sure the audience blocks are all feasible.
- If a block is not feasible, adjust the targeting design of the audience related to a ''not feasible'' estimation to make it feasible. You can expand the targeting, remove quotas or filters.
- You’re all set with Multiple Audiences and the audience section at large; you can now move on to the questionnaire.
This new feature will allow you to hyper-target your survey to befit a wide variety of segments in your target market, or any of your subject of interest.